+33 1 80 82 82 60
How to generate a CSR and install an SSL certificate in Plesk
This article helps you to generate a Certificate Signing Request (CSR) and install an SSL Certificate in Plesk.
Table of Contents
- Generating a Certificate Signing Request (CSR)
- Ordering the SSL certificate
- Installing the SSL certificate in Plesk
- Configuring the domain to use SSL
- More Information
GENERATING A CERTIFICATE SIGNING REQUEST (CSR)
To generate a Certificate Signing Request (CSR) for your website, follow these below steps:
- Log in to Plesk using your login / password. Report to the installation email for your hosting.
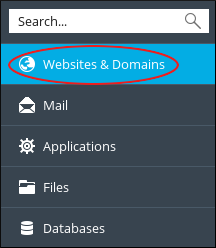
- In the left sidebar, click the « Websites & Domains » tab:
- Click the « SSL/TLS Certificates » icon in the menu:

- Click :
- On the « Add SSL/TLS Certificate » page, complete the required fields in the request form, and then click on .
Most of the fields in the request form are self-explanatory, but a few fields require special attention:
- Certificate name: this is how the certificate is displayed in Plesk. To make it easy to identify later, we recommend you to use or insert the domain name.
- Domain name: if you want your SSL certificate to protect the domain with and without the www prefix, you must type www, as an example, www.example.com.
- A certificate for www.example.com protects both example.com and www.example.com.
- A certificate for example.com only protects example.com.
- Email: Plesk sends the CSR to this e-mail address.
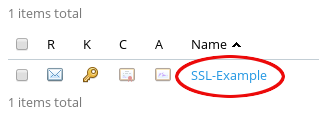
- The SSL Certificates page for the domain shows. Then click on the certificate name you entered on the request form:
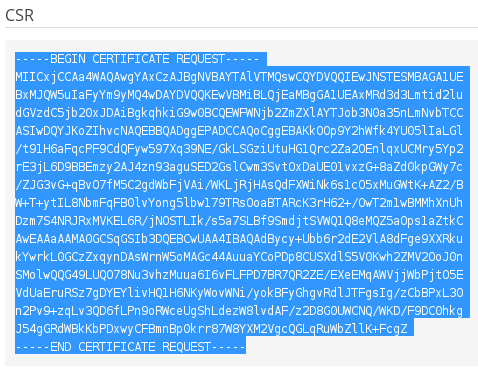
- Scroll down to the CSR section and copy all the text, including the BEGIN CERTIFICATE REQUEST and END CERTIFICATE REQUEST headers:
INSTALLING THE SSL CERTIFICATE IN PLESK
After ordering and receiving your SSL certificate (more info on https://safebrands.fr/certificats-ssl/nos-offres-de-certificats-ssl/), you are ready to install it in Plesk. To proceed, follow these below steps:
- Log in to Plesk.
- In the left sidebar, click on the « Websites & Domains » tab:
- Click the « SSL Certificates » icon:
- The SSL Certificates page for the domain shows. Then click the certificate name you have entered in the request form:
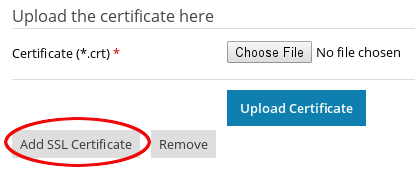
- Scroll down to the « Upload the certificate as text » section, and then in the Certificate (*.crt) text box, paste all the certificate text, including the BEGIN CERTIFICATE and END CERTIFICATE headers:
 If Plesk does not fill in the CA certificate (*-ca.crt) text box automatically, you must copy the Intermediate Bundle.
 - Click on . Then Plesk installs the certificate.
CONFIGURING THE DOMAIN TO USE SSL
Once your SSL certificate is installed, you must enable SSL support for the domain in Plesk in order to activate it. To proceed, follow these steps:
- Log into Plesk.
- In the left sidebar, click the « Websites & Domains » tab:
- Click on « Hosting Settings »:

- Under « Security » section, tick the « SSL support » check box:
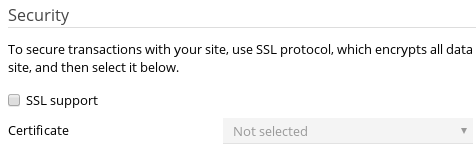
- In the « Certificate » drop down menu (as shown above), select the SSL certificate you have installed in the previous Request procedure.
- The click . Done!
MORE INFORMATION AND HELP ON PLESK
For more information and help about Plesk, please visit https://www.plesk.com.